Overview
When receiving Product for which no Purchase Order exists, a Manual Receipt will need to be created & posted.
Manual Receipts can be entered quickly and easily in BackOffice and also via SmartPOS, however, this article will cover the steps for completing this procedure in BackOffice.
Prerequisites
- To access, the applicable Operator Privileges will need to be enabled:
- Operator Maintenance 'Stock Control' Tab
- Purchasing & Receiving: "Create / Edit Purchase Orders" Flag
- Purchasing & Receiving: "Post Purchase Orders" Flag
Step-By-Step Guide
- After running BackOffice and logging in, follow the steps below to create and post a Manual Receipt:
- From the Stock Control menu, select Purchasing and Receiving
- Click on the Manual Receipt button in the header section
- Highlight the required Supplier, and click on the Select Supplier button
- Select either Blank Receipt or Copy an Existing; in this example, the Blank Receipt option is being selected
- Note: This Next step will only occur only when the flag option called Prompt for Existing P.O & Receipt is enabled within Supplier Maintenance for the selected Supplier
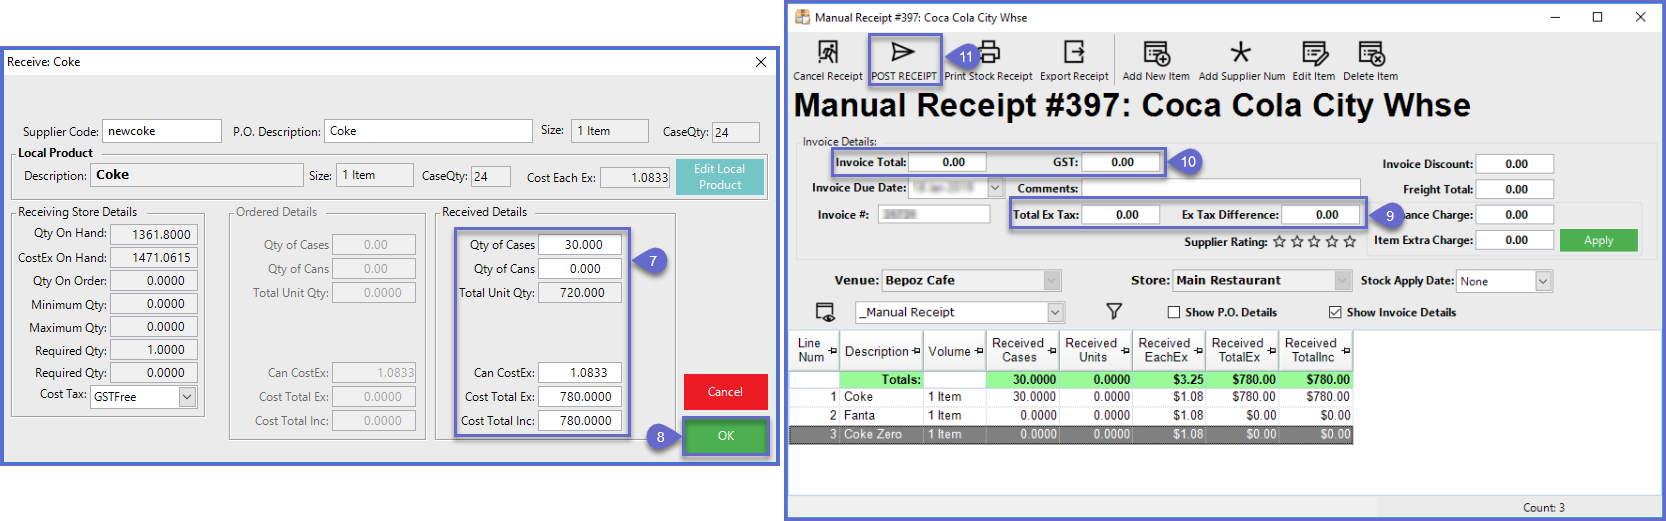
- In the Manual Receipt Menu, enter the Invoice Number then select the Add New Item button
- Search and Highlight the Product/s to be added, and click the Select Product button
- Enter the number of Cases or Units being received, check that the automated prices are correct and adjust if required
- Click on the OK button
- If more than one (1) Product was added, steps 7-8 will be repeated until all products are added
- Enter the Total Ex Tax amount from the invoice (this is the total excluding GST only)
- Enter the Invoice Total, GST, Total and any other fields required
- Select the POST RECEIPT button


Video Walkthrough