Overview
Continuing on from the "Introduction to Bistro Environment" article, this focuses on how to use Bistro Tables within SmartPOS when processing Transactions in a Venue where Bistro Service is used.
Prerequisites
- To access Transaction Features, the applicable Operator Privileges will need to be enabled
- Operator Maintenance 'Till Privileges' Tab
- General: "Operate Tills" Flag
- Tables: "Table Sales" Flag
Workflow & Example
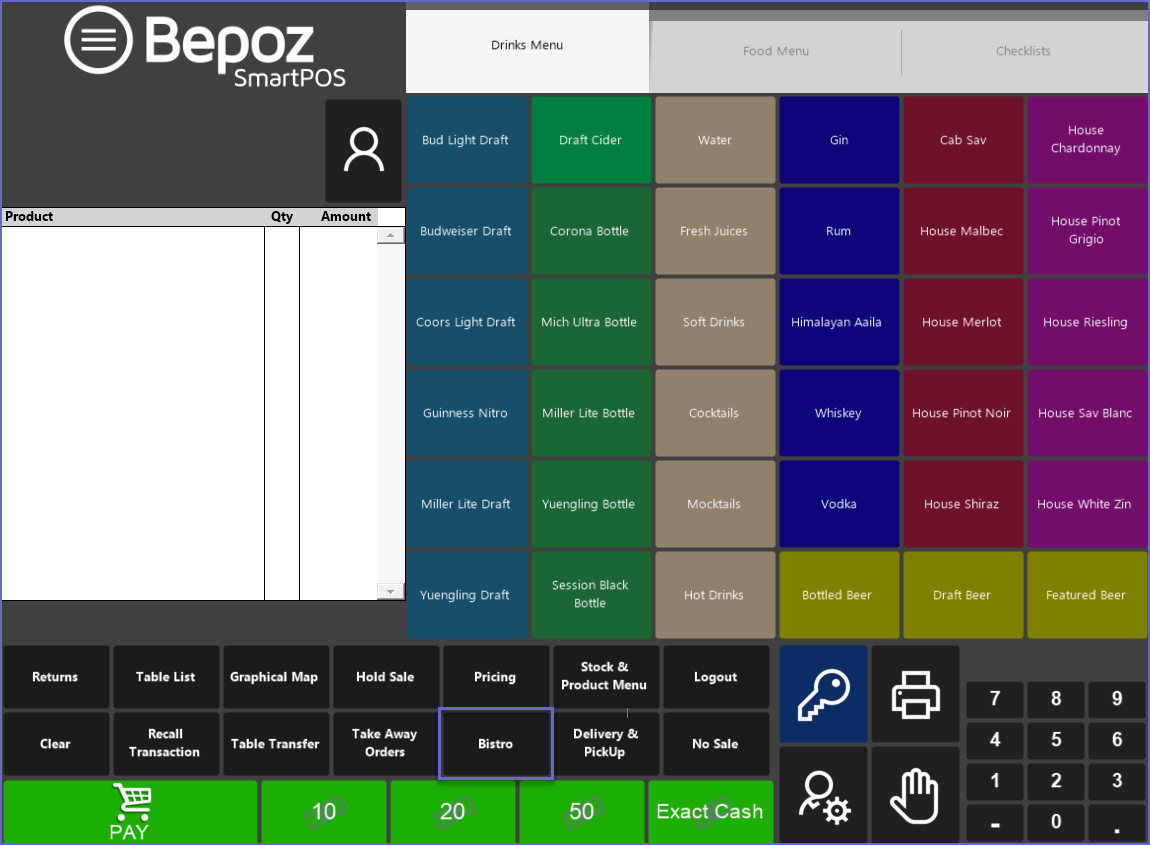
- To use Bistro Table Accounts, the SmartPOS Function Panel will need to be configured with a Till Function button to open a Bistro Table
- To begin a Bistro Table Account, tap on the Bistro Table Till Function button
- A screen will appear listing any active tables and will have additional Function buttons at the bottom of the window
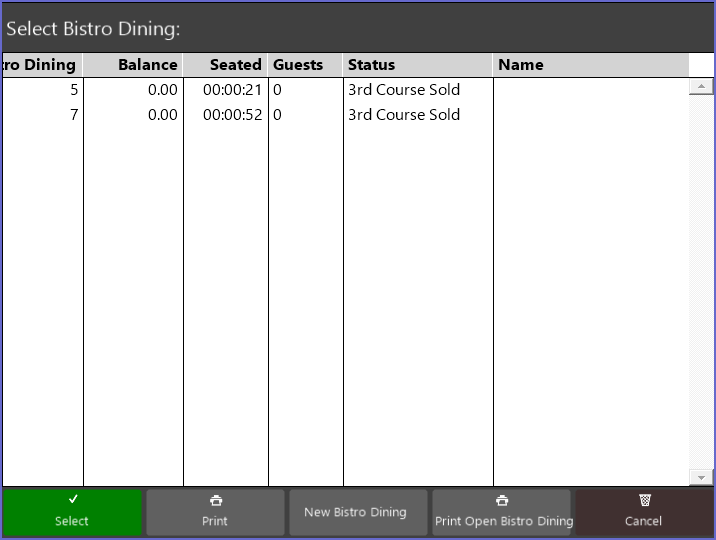
- Select the New Table (New Bistro Dining) button at the bottom of the window to open a New Bistro Transaction
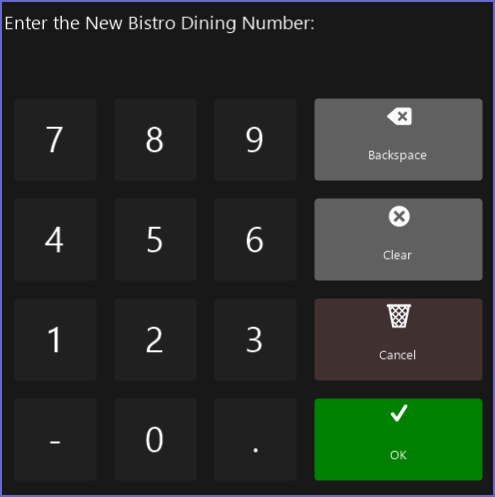
- Enter the New Table Number and select OK
- Enter the Product/s to be sold and tender the Payment for the current customer
- A similar screen will appear:
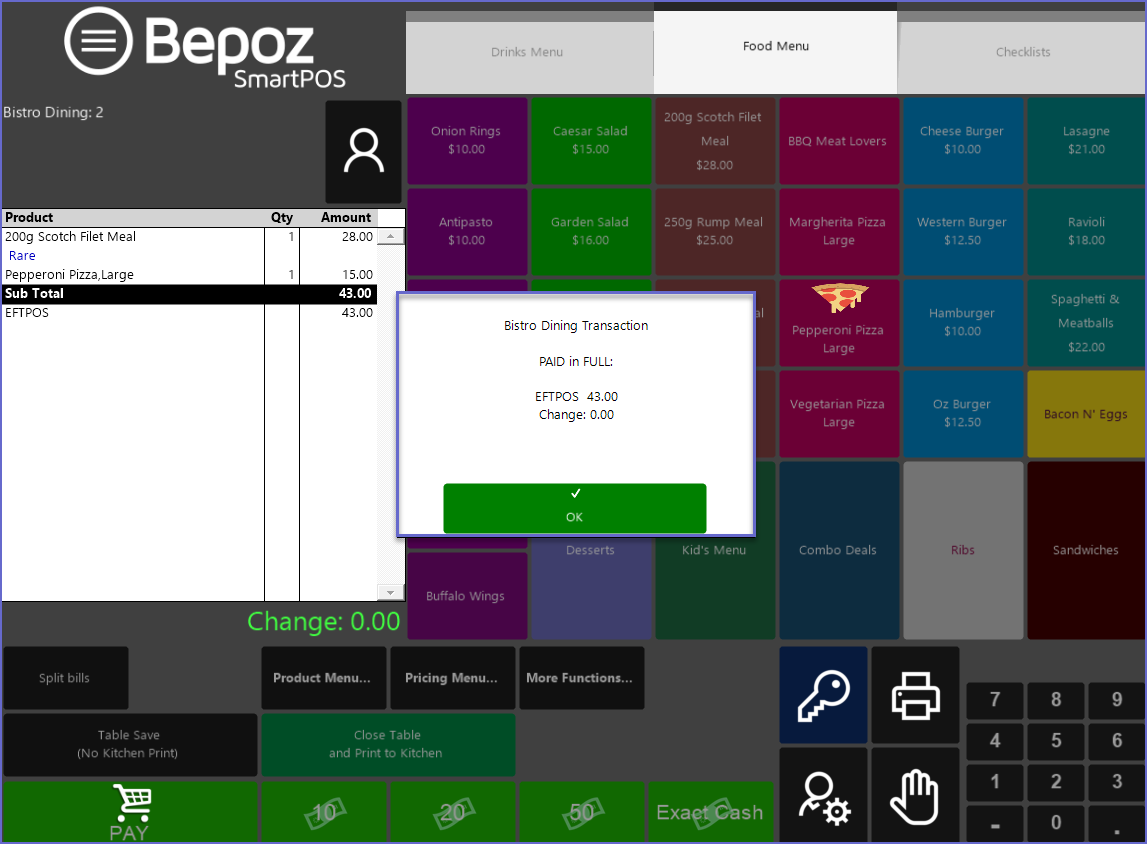
- Press the OK button and this screen will appear:
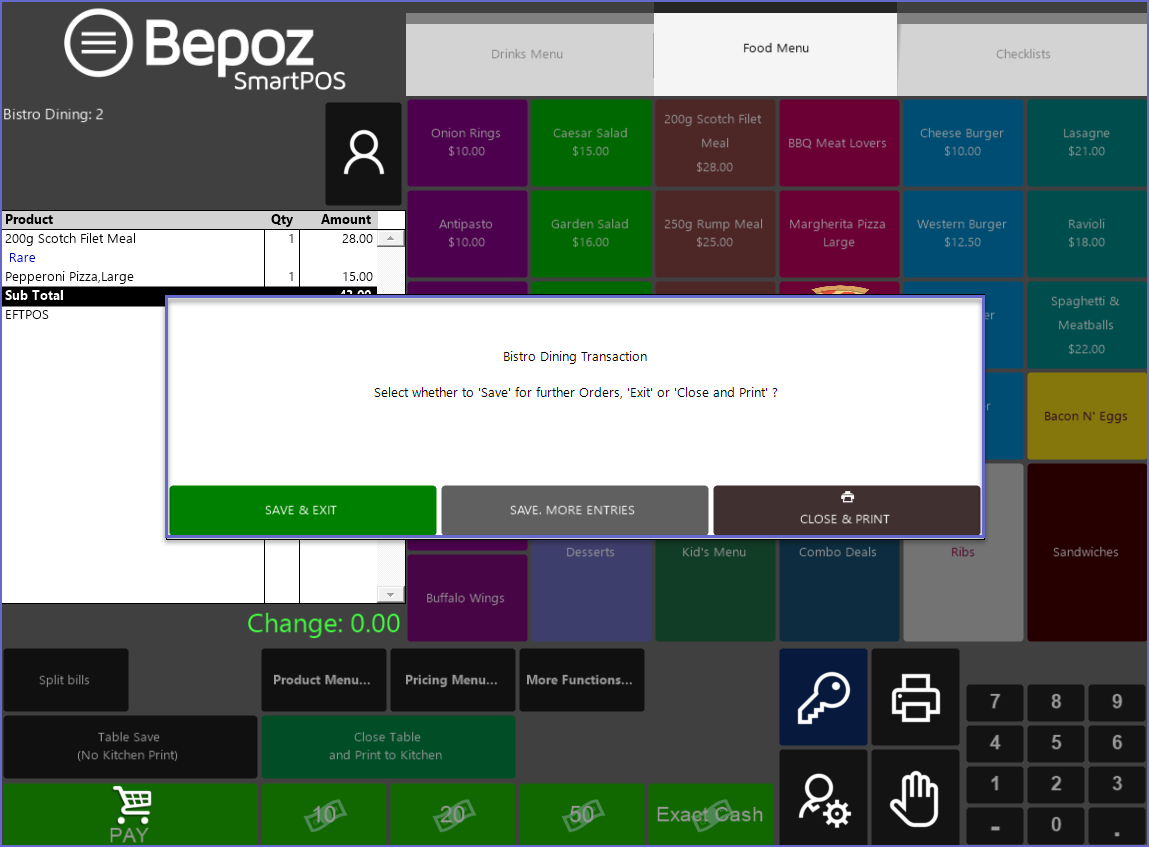
-
- This will NOT send any messages to any remote printers as Bepoz is expecting additional items to be added to this Table prior to printing at a later date/time
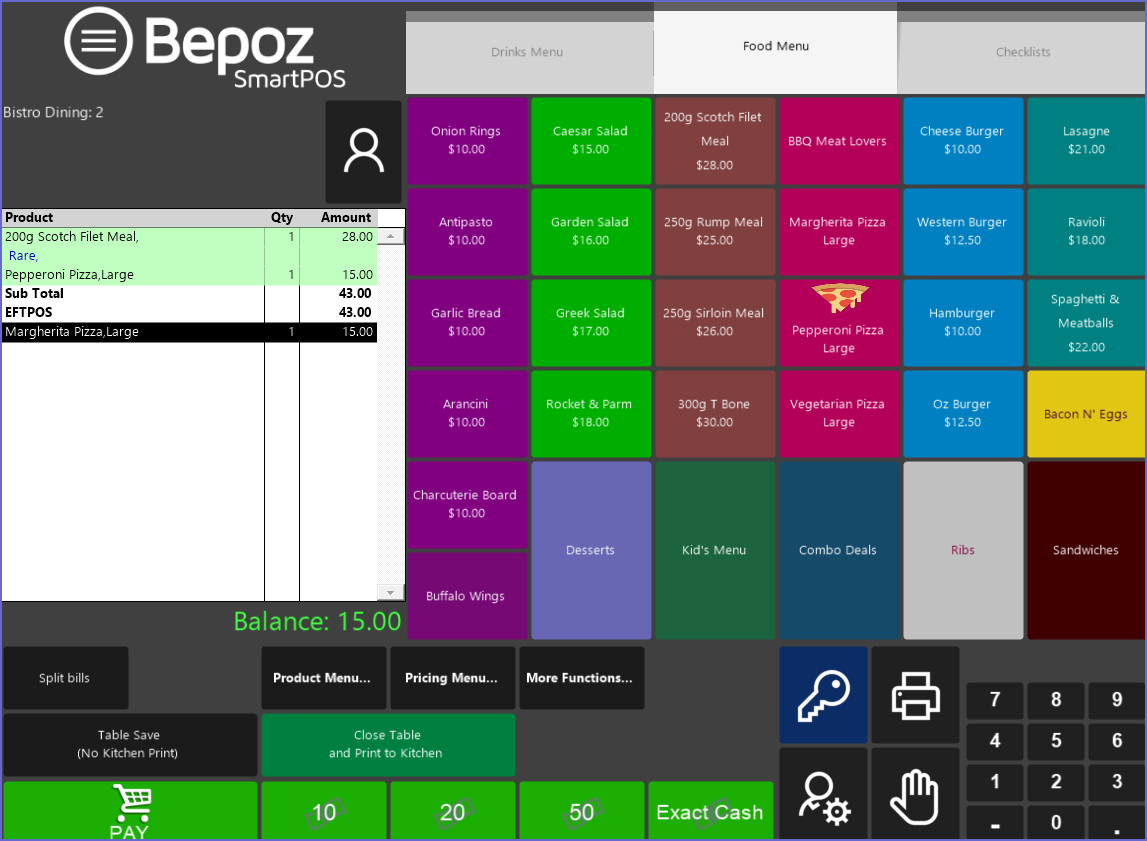
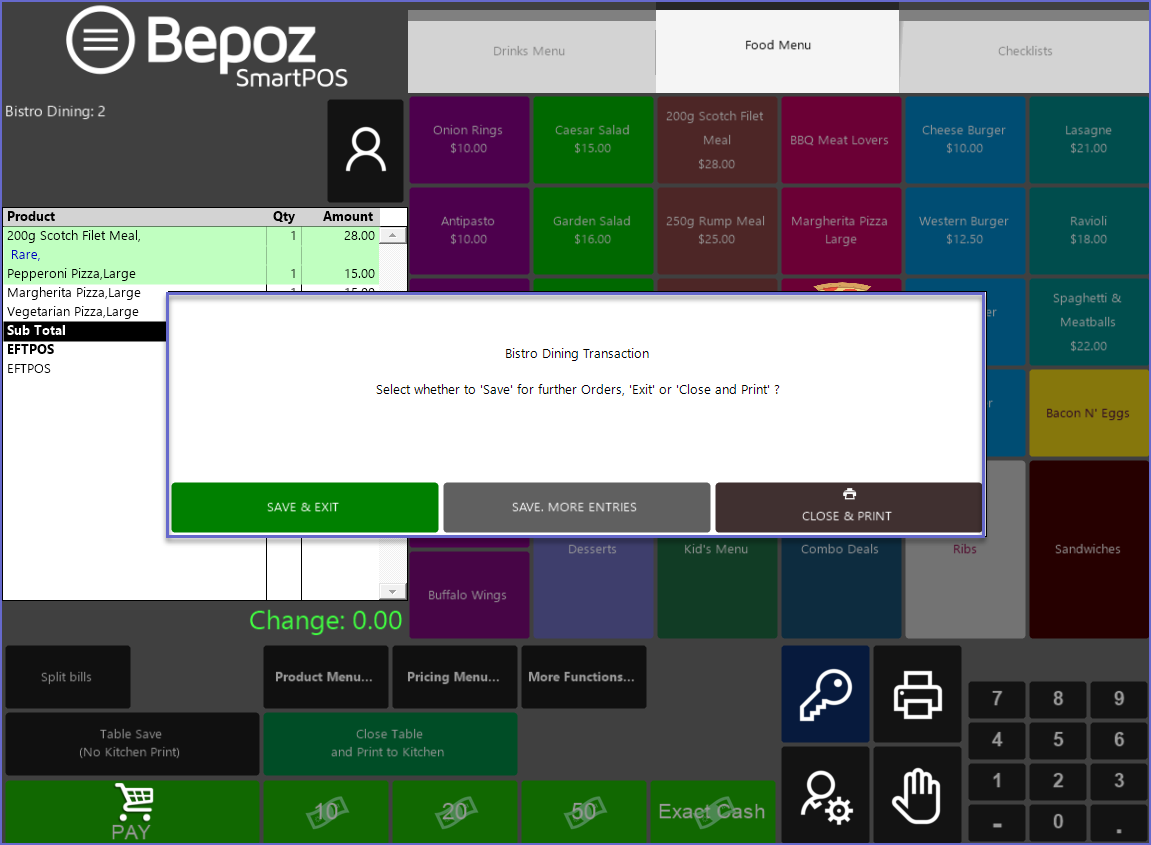
- The Operator can add the items as previously and take payment; once payment has been completed the following screen will be shown once again:
- If the Close Table and Print to Kitchen button is selected before finalizing a Payment, a dialogue will appear stating that there is a balance owing on the Bistro Table